There’s a particular kind of guilt that comes with a dining set you’ve stopped loving. It’s still functional. The chairs don’t wobble. The table holds its weight. But somewhere between the scratches that accumulated over three summers and the color that now reads more “thrift store find” than “intentional choice,” you stopped setting it properly for dinner. You stopped lighting the candle in the middle. The space that’s supposed to anchor family life started feeling like a room you just pass through.
Before you start browsing furniture websites and doing the mental math on delivery fees, consider this: the bones of your dining set are probably fine. What’s broken is the surface story it’s telling. Paint changes that story completely and not in the superficial, cosmetic way people sometimes dismiss. A well-executed paint project on a dining set can shift the entire emotional register of a room. It can make a $200 table feel considered, even curated. It can turn chairs you inherited from someone else’s life into something that finally feels like yours.
The three projects below aren’t ranked by difficulty or cost. They’re three genuinely different approaches different in aesthetic ambition, in technique, and in what kind of transformation they’re built to deliver. One of them will fit your situation better than the others. Trust that instinct when you feel it.
The Two-Tone Table and Chair Contrast
This is the project for people who want drama without chaos. The concept is simple enough to explain in a sentence paint the table one color and the chairs a complementary or contrasting color but the execution requires more thought than it gets credit for.
The most common version of this is a dark table paired with lighter chairs. Charcoal or deep navy on the table, cream or warm white on the chairs. It works because it mirrors how we naturally perceive visual weight: the table is the anchor, the chairs are the breath around it. But the version that’s been quietly gaining ground in more design-forward spaces flips that logic. Light oak or white-painted tables surrounded by chairs in forest green, terracotta, or even a muted burnt orange. The chairs become the color story. The table becomes the neutral ground they get to stand on.
Preparation is everything here. Sand the existing finish until it’s dull and receptive not stripped to bare wood necessarily, but no longer glossy. Wipe down with a tack cloth. Use a bonding primer, especially if the original finish is lacquer or polyurethane. Chalk paint has become a popular shortcut for this kind of project because it adheres to most surfaces without heavy prep, but if you want durability that holds up to actual daily dining use, a water-based alkyd paint with a satin or semi-gloss finish will outlast it by years.
The detail people consistently underestimate: the chair legs. They’re the part that gets kicked, scraped, and bumped by shoes. Whatever paint system you choose, finish with at least two coats of a clear polyurethane topcoat on any surface below seat height. It’s the difference between a project that looks great for six months and one that still looks intentional three years later.
Limewash and Texture: When You Want It to Look Like It Has a Past
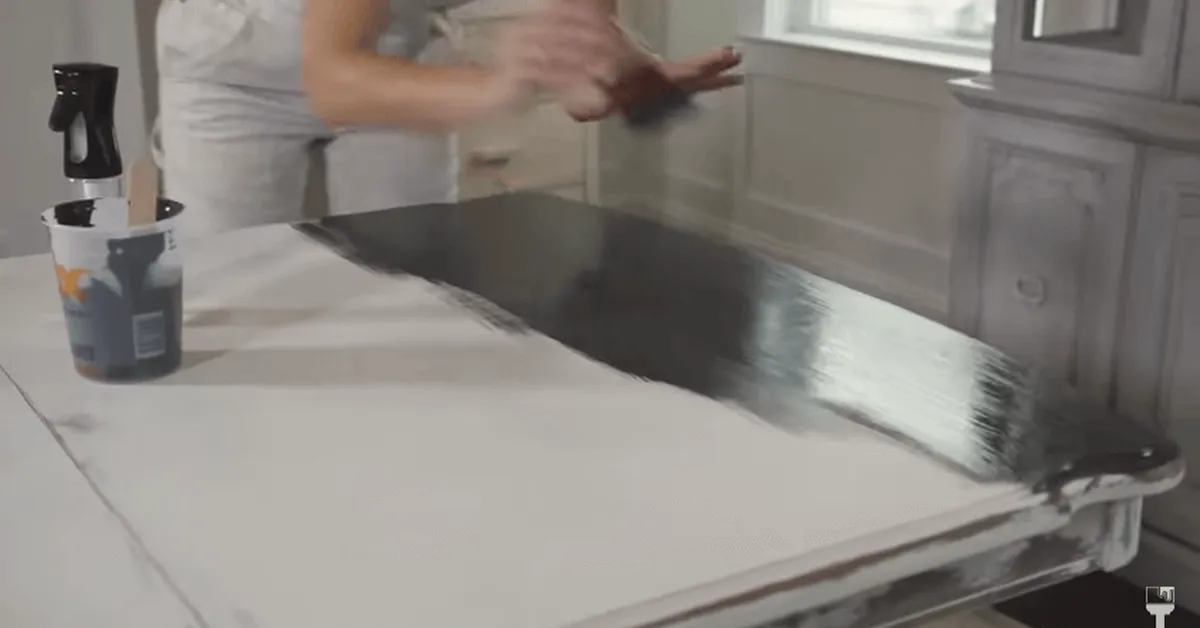
Not every dining room wants to look newly renovated. Some spaces older homes, rooms with exposed beams, kitchens that lean into warmth over polish are better served by a finish that suggests history rather than erasing it. Limewash paint does exactly that.
Limewash is a calcium carbonate-based paint with a long lineage in European architecture. When applied to furniture, it creates a soft, mottled, almost mineral surface that absorbs light differently than conventional paint. It doesn’t look painted so much as it looks aged, like something that has been in a Tuscan farmhouse for forty years and is better for it.
The technique involves applying the paint in thin, uneven layers and then partially wiping it back before it fully dries. The result is intentional inconsistency lighter in some areas, more saturated in others, with the wood grain occasionally showing through. It’s a finish that rewards imperfection, which makes it genuinely forgiving for first-time DIYers who are nervous about brush marks or uneven coverage.
For a dining set, this approach works especially well on the table surface and chair backs. Keep the chair seats in a contrasting solid finish a linen or aged white to give the eye somewhere clean to rest. The combination reads as layered and thoughtful rather than unfinished.
One honest note: limewash on furniture is not the same as limewash on walls. On walls, it’s nearly maintenance-free. On a dining table that sees food, drinks, and daily use, you’ll want to seal it with a matte furniture wax or a water-based matte topcoat. The sealing will slightly reduce that raw, mineral quality, but the character remains. Test on an inconspicuous area first to find the balance you can live with.
Stenciled Detail Work: Adding Pattern Where There Was None
This is the most technically demanding of the three, and also the most personally expressive. It’s the project for someone who looked at a plain white or cream dining set and thought: it’s fine, but it’s saying nothing.
Stenciling has an image problem. For a long time it carried associations with the kind of craft projects that felt more effortful than elegant roosters on kitchen walls, ivy borders in hallways. That era is over. Contemporary stencil design has caught up with where interior aesthetics actually are. Geometric patterns, abstract botanical motifs, Moroccan-inspired lattice work, simple linear borders these are the patterns that, when applied with restraint and the right color relationship, make a chair look like it was custom-made.
The most effective approach for dining chairs is to focus the stencil work on the chair back only. It becomes the visual signature of the piece without overwhelming it. Choose a stencil pattern with a scale that fits your chair back proportions a pattern that’s too small reads as busy and labored, while a slightly larger repeat feels intentional and graphic.
Color relationship matters enormously here. The most sophisticated results tend to come from low-contrast pairings: a warm white chair back with a stenciled pattern in soft gold, or a slate blue base with a slightly lighter blue-gray pattern. High contrast black pattern on white, for instance works too, but it’s less forgiving of imprecision. Any small misalignment or bleed becomes visible immediately.
Use a dense foam roller rather than a brush for applying paint through the stencil. Rollers deposit a thin, even layer with far less risk of bleeding under the stencil edge. Apply less paint than you think you need. You can always add a second pass; you can’t undo a bleed that’s soaked into a porous surface.
The table in this scenario often works best left simple a solid repaint in a color that pulls from the stencil palette, or even a natural wood finish if the grain is worth preserving. The chairs are already making the statement. The table’s job is to let them.
What All Three Projects Share
Beyond technique, these projects share something harder to name. They’re all acts of attention. Choosing to repaint a dining set rather than replace it is a decision that says: I’m going to look closely at what I already have. I’m going to spend time with it. I’m going to imagine it differently.
That kind of attention has a way of changing how you use a space afterward. People who repaint their own furniture tend to set the table more. They notice the light in the room at different hours. They become, almost involuntarily, more present in the spaces they’ve put work into.
The dining room is one of the last rooms in a home that still has a social function built into its design. It exists specifically for gathering. Whatever project you choose the bold contrast, the worn and storied limewash, the quietly patterned chairs you’re not just refreshing furniture. You’re deciding, in a small but real way, what kind of room you want to come home to.