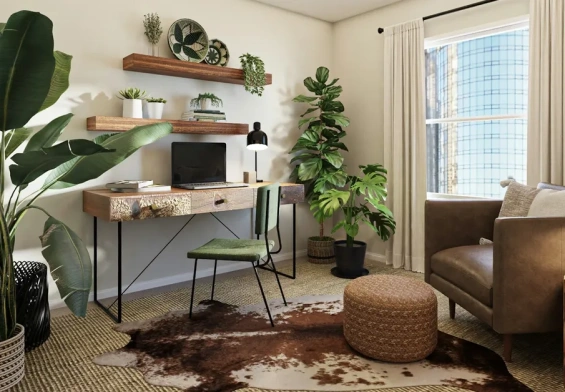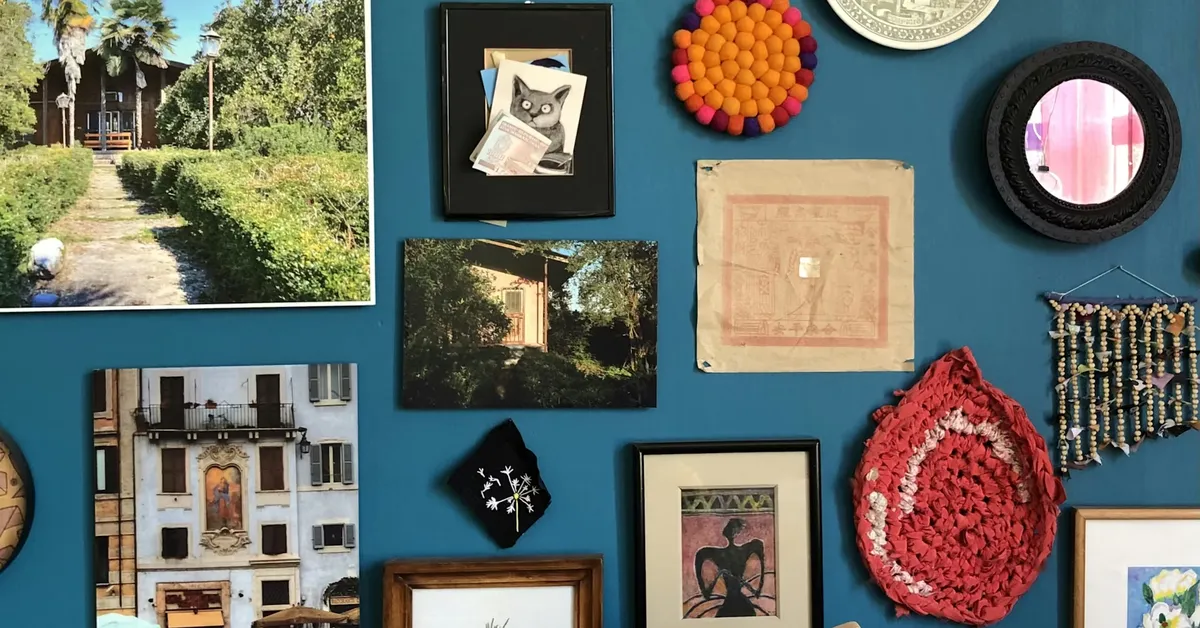
There’s a particular kind of confidence that comes with a well-executed gallery wall. You walk into a room and it stops you not because it’s loud, but because it feels considered. Like someone actually thought about what belongs together and why. The frames don’t match perfectly, the sizes are all over the place, and somehow that’s exactly the point. It looks effortless. It is not effortless.
Behind every gallery wall that earns a second glance is a process that most people skip entirely and that process almost always begins long before a single nail touches drywall. It begins with the fear of commitment. Because unlike rearranging furniture or swapping throw pillows, hanging things on walls feels permanent. One wrong hole and you’re staring at a patch job that never quite blends in. One miscalculated arrangement and you’ve got a lopsided cluster of frames that makes the whole wall feel anxious.
So let’s slow down and actually do this right.
The Layout Is the Real Artwork
Most people start with their frames. They should start with their floor.
Lay everything out on the ground first every piece you’re considering, in the approximate arrangement you want on the wall. This sounds obvious, but it’s genuinely transformative. The floor gives you a flat, low-stakes surface to audition combinations. You can stand over it, walk around it, photograph it from different angles. You’ll immediately notice things you wouldn’t catch until it was too late: that two horizontal frames stacked vertically create a visual column that anchors the whole composition, or that your one oversized print needs to sit slightly left of center to stop the arrangement from feeling like it’s sliding off the wall.
The golden rule most designers follow is to treat the entire gallery as a single unit. The outer edges of your arrangement should form a rough shape rectangle, square, loose organic blob, whatever suits your space and that shape should feel intentional. Gaps matter. The space between frames is as much a design decision as the frames themselves. Around two to three inches between pieces tends to read as cohesive without feeling cramped. Go tighter and it looks chaotic. Go wider and the pieces stop talking to each other.
Once you’re happy with the floor layout, photograph it. That photo becomes your map.
Protecting Your Walls Before You Even Pick Up a Hammer
Here’s where the real anxiety lives. Paint is expensive. Walls are not infinitely forgiving. And rental agreements have a way of making you paranoid about every single hole.
The good news is that protecting your paint isn’t complicated it just requires a little patience and the right materials upfront.
Start with painter’s tape. Before you commit to any nail placement, use tape to outline the frames directly on the wall. This lets you see the actual footprint of each piece in context, at eye level, in real lighting. What looked perfectly balanced on your floor might shift slightly once it’s vertical. The tape costs you nothing and saves you from the most common mistake: hanging the first piece and realizing the whole arrangement needs to shift six inches to the left.
For the nails themselves, the type of hardware you use matters more than most people realize. For lightweight to medium frames anything under about fifteen pounds adhesive strips like Command strips are genuinely reliable when used correctly. The “correctly” part is crucial. Most adhesive failures happen because people skip the thirty-second alcohol wipe-down of the wall surface before application, or they hang the frame before the adhesive has fully cured. Follow the wait times. They exist for a reason.
For heavier pieces, you’re going to need actual nails or wall anchors, and that’s fine. The key to minimizing damage is using the smallest nail that can do the job. A thin finish nail leaves a hole so small it practically disappears under paint. If you’re going into drywall without a stud, use a proper anchor rated for the weight a toggle bolt or a self-drilling drywall anchor. These distribute the load and prevent the slow, devastating creep of a nail pulling through soft drywall over time.
One trick that almost no one talks about: put a small piece of painter’s tape on the wall where you’re going to hammer. Drive the nail through the tape. When you eventually remove the nail, the tape helps pull away cleanly without peeling the surrounding paint. It sounds like a minor thing. It isn’t.
The Paper Template Method (And Why It Changes Everything)
If you want to hang a multi-frame gallery wall with precision and zero guesswork, the paper template method is the move.
Trace each frame onto kraft paper or newspaper. Cut out the shapes. Mark the exact location of the hanging hardware on each template where the nail needs to go, not where the frame sits. Then tape these paper cutouts to your wall in your planned arrangement, using your floor photo as reference.
Now you can see the full layout at actual scale, on the actual wall, before a single hole exists. You can shift things around, rebalance, add or remove pieces. When everything looks right, you simply hammer through the paper at the marked hardware points, then tear away the paper. Your nails are exactly where they need to be.
This method is especially useful when you’re dealing with frames that have wire hanging systems, where the nail position changes depending on how taut the wire is pulled. A little math here goes a long way: measure the distance from the top of the frame to the wire at its peak tension, then subtract that number from the total frame height. That tells you how far below the top of the frame your nail needs to sit. Mark it on your template. Done.
Mixing Frames Without Creating Visual Noise
A gallery wall doesn’t need to be matchy-matchy in fact, a perfectly uniform set of frames often reads as sterile rather than curated. But mixing frames without creating chaos requires a unifying thread.
That thread can be color. Black frames of wildly different styles and sizes read as cohesive because the color does the organizing work. It can be material a mix of natural wood tones in different shapes feels warm and collected rather than random. It can even be mat color: a consistent white or cream mat inside every frame creates visual harmony even when the frames themselves are all over the place.
What tends to go wrong is mixing too many variables at once. Different frame colors, different mat colors, wildly different subject matter, inconsistent orientations each of those is a decision that asks your eye to do more work. The best gallery walls make one or two deliberate choices and then let everything else vary. That contrast between structure and freedom is exactly what makes them feel curated rather than cluttered.
Content matters too. A gallery wall built around a single theme travel photography, botanical prints, black-and-white portraiture has a narrative logic that a viewer can feel even if they can’t articulate it. That doesn’t mean every piece needs to match literally. It means there should be a reason these particular things ended up on this particular wall together.
The Hanging Day Itself
Do it in good light. Natural daylight is unforgiving in the best possible way it shows you every crooked frame and every shadow gap that you’d miss under warm artificial lighting. Hang in the morning or on an overcast day when the light is even.
Bring a level. Even if you have a good eye, bring a level. The human brain is remarkably good at detecting off-kilter frames and remarkably bad at correcting them freehand. A small torpedo level costs almost nothing and eliminates one of the most common finishing frustrations.
Step back constantly. After every piece goes up, walk to the other side of the room and look. What feels right up close often looks different from a distance. Gallery walls are meant to be seen from across a room, not inspected from two feet away.
And when it’s done when the last frame is level and the arrangement finally matches the vision you had on the floor resist the urge to immediately add more. Live with it for a few weeks. See how the light changes across it throughout the day. See which pieces your eye keeps returning to and which ones quietly disappear into the background.
A gallery wall is never really finished. It’s just at a version you’re happy with for now. And there’s something quietly satisfying about that the idea that a wall can keep evolving, that it’s allowed to change as you do, without ever needing to be perfect to be worth looking at.