The Gap Between Good and Convincing
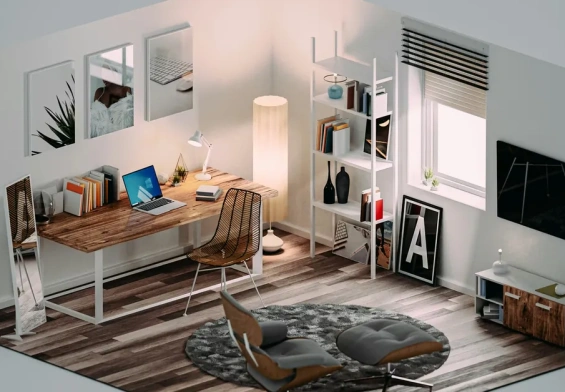
There’s a particular kind of frustration that every 3D artist knows. You’ve spent hours on a kitchen scene the lighting feels right, the proportions are solid, the materials look clean and yet something is off. It doesn’t read as real. Clients scroll past it. You stare at it trying to diagnose the problem, and the answer is almost never the big things. It’s the hardware.
Cabinet pulls, hinges, faucet bodies, knobs, edge profiles these are the details that separate a render that looks like a software demo from one that makes someone say “wait, is this a photo?” And the reason most artists underestimate them isn’t laziness. It’s that hardware is genuinely difficult to get right. The geometry is small, the material behavior is complex, and the reference is easy to misread. But when you nail it, the entire scene shifts register. Everything around the hardware suddenly looks more credible too.
Why Hardware Carries So Much Visual Weight
The human eye is trained on kitchens. We’ve touched cabinet doors thousands of times. We know, at some subconscious level, how a bar pull catches light at the end of a long day, how a knob casts a tiny shadow on a drawer face, how the gap between a pull and the wood it’s mounted on creates a thin line of darkness. This accumulated tactile memory means viewers are extraordinarily sensitive to hardware that doesn’t behave correctly even if they can’t articulate why.
This is different from, say, a sofa cushion or a piece of abstract art in the background. Those elements have looser visual rules. Hardware has physics. It’s almost always metal or metal-adjacent. It has tight tolerances. It reflects its environment in specific, predictable ways. When those reflections are wrong too uniform, too clean, missing the subtle anisotropy of a brushed finish the brain registers a quiet alarm. The scene feels like a scene.
Material Behavior Is the Starting Point
Before geometry, before placement, before scale material behavior determines whether your hardware reads as real. And the most common mistake isn’t choosing the wrong finish. It’s treating the finish as a single, uniform value.
Brushed nickel, for instance, is not just a gray metallic material with some roughness dialed up. Real brushed nickel has directional micro-scratches that create anisotropic reflections highlights that stretch perpendicular to the brush direction. In a physically based renderer, this means using an anisotropic BRDF and rotating it to match the brushing direction on the actual model. A pull that runs horizontally should have its anisotropy oriented differently than a knob, which might show a radial brushing pattern from the manufacturing process.
Polished chrome is the other extreme, and it trips up artists in the opposite direction. The temptation is to crank reflectivity to maximum and call it done. But real chrome has a slight blue-gray tint in its reflections, and it picks up environmental color with almost aggressive fidelity. If your kitchen scene has warm cabinet tones and a soft overhead light, your chrome hardware should be pulling those colors in. If it looks like a mirror in a void, it’s wrong and it will read as wrong even to someone who couldn’t explain why.
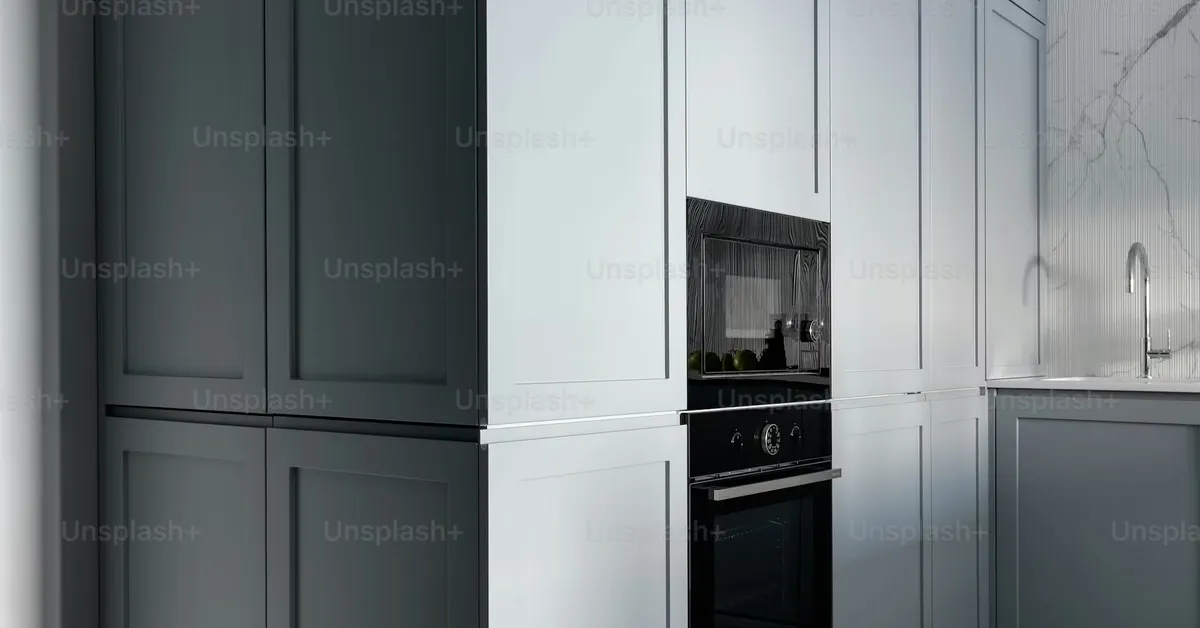
Matte black hardware, which has dominated design trends for years now, presents its own challenge. The roughness isn’t uniform. There are fingerprint oils, slight variations in the coating, micro-highlights at sharp edges where the coating is thinner. A perfectly uniform matte black pull looks like a placeholder. Add subtle roughness variation through a noise-driven roughness map, let the sharp edges catch just a whisper of specular, and suddenly it has presence.
Geometry That Earns Its Detail
Hardware geometry is where render budgets get debated. High-poly models take time to source or build, and on a tight deadline, it’s tempting to use simplified stand-ins. The problem is that hardware geometry carries specific tells that viewers recognize.
The most important: chamfers and fillets. Real manufactured hardware especially anything in the mid-to-high price range has precisely controlled edge treatments. A cabinet pull that costs forty dollars has a different edge profile than one that costs four. The expensive pull has a consistent, intentional chamfer. The cheap one has sharper, more irregular edges. In a render meant to convey luxury, your hardware geometry needs to communicate that intentionality. A bevel of even one or two millimeters, applied consistently and cleanly, changes how light travels across the form.
Screw heads matter more than almost anyone thinks. Most artists either omit them entirely or use a simple cylinder with a slot cut into the top. But real mounting screws especially on quality hardware have specific head profiles, often Phillips or Torx, with a countersink that creates a subtle depression in the pull’s backplate. When light catches that tiny recess, it adds a layer of authenticity that is completely disproportionate to the polygon cost.
Backplates deserve their own mention. A lot of hardware, particularly in traditional and transitional kitchen styles, mounts with a backplate a small decorative plate that sits between the pull and the cabinet face. This element creates a layered shadow, a thin gap, a sense of depth at the mounting point. Omitting it, or modeling it as a flat decal, collapses that depth and makes the hardware look glued on rather than installed.
Scale, Spacing, and the Logic of Placement
Even perfect materials and geometry will fail if the hardware isn’t placed with the logic of how it would actually be installed. This sounds obvious, but the errors are common.
Center-to-center measurement is the language of cabinet hardware. A pull specified at 3-inch center-to-center means the distance between its two mounting holes is three inches. The overall length of the pull is longer often by an inch or more on each end. When artists model or source hardware, they sometimes confuse overall length with center-to-center, which results in pulls that are either too small for their mounting holes or scaled incorrectly relative to the drawer face.
Placement height on drawer fronts follows conventions that real kitchen designers use. On a standard drawer, the pull typically sits at the vertical center of the drawer face. On tall upper cabinet doors, it sits roughly a third of the way from the bottom edge. These conventions exist because they’re ergonomically correct they’re where your hand naturally reaches. When hardware is placed at random heights, the scene communicates a kind of spatial carelessness that undermines the overall quality of the design.
Gap consistency is the detail that separates someone who’s thought about hardware from someone who hasn’t. The space between a pull and the drawer face created by the standoff distance of the screws should be identical across every piece of hardware in the scene. In real kitchens, this is guaranteed by the hardware itself. In a 3D scene, it has to be managed manually. When those gaps vary, even slightly, the eye catches it as inconsistency.
The Faucet as the Scene’s Anchor
In kitchen renders, the faucet occupies a unique position. It’s larger than any other hardware element, it sits in the most visually prominent zone of the scene, and it’s almost always the most complex piece to render correctly. It also has moving parts or the suggestion of them which means its geometry has to communicate mechanical logic.
The base where the faucet meets the countertop is a critical detail. Real faucets have a deck plate or escutcheon that covers the mounting hole and sits flush or nearly flush against the counter surface. The contact point between that plate and the countertop material creates a thin shadow line, a slight compression of the surface, a sense of weight. Without it, the faucet floats. With it, it’s installed.
Water in the spout or the absence of it is a choice that carries meaning. A running water effect, done poorly, looks like a glass rod. Done well, it requires volumetric scattering, accurate refraction, and surface tension behavior at the stream’s edge. Many artists wisely choose not to render water at all, letting the dry faucet speak for itself. That’s a legitimate call. What isn’t legitimate is a half-committed water effect that reads as neither water nor air.
The finish on a faucet has to be consistent with the other hardware in the scene. This seems self-evident, but the failure mode is subtle: a brushed gold faucet and brushed gold pulls that were sourced from different asset libraries and use different material setups. They’ll read as two different metals. Unifying the material parameters roughness values, base color, reflection tint across all hardware in a scene is one of those invisible tasks that no one notices when you do it right and everyone notices when you don’t.
There’s something almost philosophical about hardware in a 3D kitchen. It’s the part of the scene that most directly simulates the act of touching the thing you’d reach for if you walked into the room. Getting it right is a way of respecting that simulation, of saying to the viewer: this place exists, and you could live in it. That’s the promise of architectural visualization, and it lives or dies in the details most people never think to name.